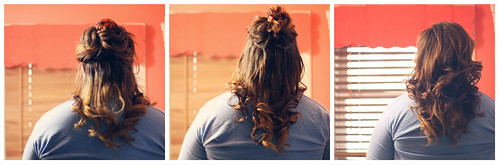
Showing posts with label advisory. Show all posts

Thursday, October 31, 2013

Final decision


Click for large.

After this post, I decided to try a slightly different approach for my portfolio headshot to see if I could come up with something more creative, and that offers both more personality and more clarity as to who I am & what I do. So I got my new glasses and decided to try displaying some books, but in a clever way. This is the result. My boss was truly amazing and took the pictures for me, so I could focus on balancing this stack on my head. I cannot say that this would have ended well had I been using a remote! I'm really happy with this picture, and very excited that it turned out as well as it did. This photo may seem typically librarian-y, but from what I've found, I'm one of the few students graduating in December with any interest in working with adults in public libraries. Also, I sure as hell ain't shushing anyone, so there's that.

For those wondering, the books on my head, from top to bottom, are:

The Tipping Point: How Little Things Can Make a Big Difference by Malcolm Gladwell: I've never read this book, but I thought it was apt to have it on the top of a pile of books on my head. Gladwell is a very attractive author for readers who want to learn about social sciences but don't want anything aggressively over their heads.

Where'd You Go, Bernadette by Maria Semple: Only a handful of books have been able to make me laugh like this one did. A favourite RA go-to book for anyone looking for a smart laugh.

To America with Love by A. A. Gill: Another book I haven't read, but I wanted to include a more recent nonfiction book and Gill writes about United States minutia that fascinates a lot of readers. Great for Americana fans.

The Art of Fielding by Chad Harbach: Hands down one of my favourite books of all time. I read it every October. Great for an intelligent reader, readers who like dysfunctional families and dramas, and strongly character-driven books.

The Influencing Machine: Brooke Gladstone on the Media by Brooke Gladstone and Josh Neufeld: An excellent graphic novel about the history of media and how the industry has had a lasting influence on society. Graphic novels are excellent for reluctant readers, and a couple of the guys have really enjoyed this one. Also good for teens in civics classes.

I plan to include the information listed above--or at least the titles and authors--with the photo that will be the opening page of my portfolio. I think it adds another touch of personality to have that info there instead of leaving the reader curious but straining to see the titles of some of the books.

Also: what's up new glasses!

Sunday, October 20, 2013

I need advice


This Introduction Page welcomes visitors to the end-of-program portfolio. It provides and overview of the content and how to navigate the portfolio. A photograph is also a desirable part of the introduction and should be a head shot or photograph taken in a professional setting.

I have to pick a "headshot" for my portfolio for school, and this is the one I currently have picked out. I know it's old--from March--but I am struggling to find a photo that evenly balance professional with personal. I don't want to do some dumb against-a-white-background headshot, but I also don't want to do something ridiculous. What do you think? Should I do something more recent, with my hair short? I'm getting new classes next week (SO excited, you guys!), so should I wait until I get those? If you don't think this picture is right, what would you envision? My friends and coworkers think I'm overthinking this, and I should "just use whatever's on (my) blog", but this is the very first thing my advisor will see when she opens my portfolio and since this my graduation hinges on this portfolio, I want to put my very best face forward. & I know I'm not smiling, but that's kind of standard. I have other pictures where I'm smiling, but I'm not sure how professional they look comparatively.

So: thoughts?

Saturday, March 9, 2013

The long-awaited hair tutorial

Everyone wanted to know how I achieved the glorious hairstyle in this post, so here is the step by step process in all its glory!


1" curling iron | hair tie or hair clip | bobby pins | music of some sort

These are the items you will need. Hairspray is optional. Music is not.


Step 1. Start with bedhead, because there's nothing classier than sharing a photo of your bedhead with the internet.


Step 2. If you have any dampness in your hair like I usually do in the morning, get rid of it. This is also a good time to seal in or adjust your part if necessary. To do that, part your hair where you want to, then blast it for a bit with cool air. If you don't have a blowdryer, make sure to do this when your hair is entirely dry--manufactured curls do not hold in even slightly damp hair, especially if you have stubborn hair.


Step 3. Gather your supplies: music, curling iron, and hair clip or hair tie.


Step 4. Clip/tie up half of your hair, & pin back any bangs or loose strands so you don't end up curling the wrong thing at the wrong time. Part the loose section down the middle. Curl the hair, going away from the face. I recommend pulling the stand down right after curling it so you get more of a loose, wavy curl than a sun-will-come-out-tomorrow look.


Step 5. AWAY from the face.


Step 6. I AM NOT JOKING IF YOU CURL TOWARD YOUR FACE YOU WILL LOOK LIKE A SOCCER MOM.


Step 7. Keep going until it's all done. It usually takes me about 45 minutes to do, but I have an exceptional amount of very thick hair. For hair of average thickness or shorter length, I wouldn't estimate more than 25 minutes of curling.


Step 8. Unpreen. Finger brush it to loosen the waves. You can also use a soft bristle brush if you prefer that, but tousle it a little bit afterward--unless the 1940s movie star look is your thing (and it's a good thing to be a thing!), in which case stop here.


Step 9. If you want to or think you need to, give all of your hair a quick sweep with the hairspray. I use this stuff simply because my mom stopped using it and there's still like three fourths of a can left. After that, back comb the ends a bit with your fingers for added volume/insanity.


Step 10: Bask.

Although this is a pretty straightforward tutorial, I'm really not sure how it will look on anyone else's hair. I think mine looks good with this style because of the amount of layers I have in my hair, so the curl is defined from cheek height all the way down to the ends. I don't know if it will look as brilliant on women with blunt haircuts, but I'd love to know so tell me if you decide to try this out!

Sunday, February 10, 2013

How to wear clothes that make you nervous


Dress: Belk | Tights: Target | Boots: Target

I really liked this dress the first time I tried it on. And I still do, months later. But I could never bring myself to wear it. Despite being basically the same cut as a pencil skirt and a short sleeve shirt, it's a lot different for me somehow. But I came up with some rules for wearing intimidating clothing that I thought I should share, because I finally got the balls to wear this thing out in public.

Wear it on a Sunday. I am lucky (?) enough to work one Sunday a month. The library operates on a skeleton crew of 1-5 people per department, public services staff only, so not nearly as many coworkers are around. I find this the best time to try weird clothing for the first time; my department coworker is really supportive of my style, and I think generally people are more forgiving of what I wear on Sundays because maybe I came from church and they don't want to offend what I wore in god's house.

Pair it with something comfortable. I don't mean sweatpants--though if that's what works for you, go for it--but other clothing that you know you feel good in and looks right. I've worn this tights/boots combo before, and I know it looks solid. Now isn't the time to go crazy with new colours and patterns and insanity.

Do one other bold thing. But! Now is the time to one small nibble of vibrancy that you're already comfortable with to offset the clothing. For me, I already know this lipstick is a friend, not a foe, and it's something I can rely on to take a little attention away from the dress. I don't recommend wearing a neon top with a neon skirt if it's your first time out with the skirt, but a bold necklace or something similar helps even out the attention you perceive yourself as drawing to your body.

Don't hide behind your hair. Seriously, don't. First of all, it looks a mess. Second, it's going to drop your confidence tenfold if you think you can successfully hide behind your hair. Pull it back this time and let the clothing shine. It's like ripping off a bandaid.

Remember that no one will remember this tomorrow. Seriously. No one cares.

Saturday, November 5, 2011

Saturday School: the constellation cardigan

I've received majorly positive feedback (thank you so much by the way--you're all incredibly sweet!) on my how-to-ish posts recently, like my scarf tutorial and the reveal of my constellation cardigan, based on this cardigan from Anthropologie. So I thought I'd try incorporating a monthly series called Saturday School (clever, right?) of me helping you do stuff! So the inaugural Saturday School tutorial is how to make the constellation cardigan yourself.


Don't you love my awkward laughter? I also had to film this twice because the first time I did it I played it back and I had cut off my own head. That's talent right there.

Does anyone have any suggestions for what they'd like to see Saturday School cover in the future? Hair, colour theory, pattern mixing? Please suggest, and enjoy!

Tuesday, November 1, 2011

Scarves for all occasions

It's officially scarf season here in Cardiganland, and really in most of the northern hemisphere. I have more scarves than you can shake a stick at, so I thought it would be cool in conjunction with Rachel's Wear*It Wednesday to do a scarf wearing tutorial! There are soooo many ways to wear scarves and this tutorial is by no means inclusive, so if you have suggestions or ideas of your own, feel free to add them.

Just a warning, I make some really stupid/angry faces in this post. I wasn't angry though; this is just my face. No makeup, sometimes not even glasses, hair that looks like the Flying Spaghetti Monster, and kind of blurry in spots. But hopefully you still get the point. I made up all the dumb names for these myself. Here we go!

The basic knot


1. Loop your scarf around your neck.
2. Tie a single knot below it.

The twisted knot


1. Fold your scarf in half.
2. Slip one end of the scarf through the loop.
3. Below that end, twist the loop 180 degrees and put the other end through the loop.

The necklace


1. Take a square scarf and fold it in half diagonally.
2. Tie the diagonal ends together.
3. Add a necklace for good measure.

The square cape


1. Take a square scarf and tie adjacent corners together.
2. See where my arm is? That's where my neck goes.
3. Wear it at the front or over one shoulder if you dig the windswept look.

The double


1. Tie two scarves together.
2. Wrap, wrap, wrap.
3. Tie the other ends together.

The checkmate (my favourite)


1. Take two scarves and fold them in half.
2. Drape both over the neck in the same orientation.
3. Take the end of one scarf and slip it through the loop of the other.
4. Take the end of the other scarf and slip it through the other loop.

The Kenny


1. Wear your circle scarf like an idiot.

The sidesaddle


1. Start with a circle scarf.
2. Add an additional scarf underneath.
3. Loop the scarf partway up over the circle scarf.
4. Pull the ends through the loop.

The big ass bow (this one's ridiculous)


1. Tie a single knot under your neck.
2. Fold a circle scarf in half and insert it below the knot.
3. Tie another single knot underneath the bow.

Of course, the final step for any of these is to check in the mirror and fluff/adjust as necessary. Especially with the double I like to preen the scarves to perfection. Because you know, you aren't really a hipster unless you have a perfectly sculpted scarf to complete your ensemble.

What do you think? Will you try any of these? Isn't that bow bananas? I'll probably never wear it in real life but I thought it looked comical.

Wednesday, August 10, 2011

Seeing spots and lines and other shapes


Necklace: gift from parents
Top: JCPenney
Skirt: JCPenney
Wedges: Pink Studio


Everybody, Everywear | Pattern MixingI'm going to say two words that might scare the daylights out of you.

Pattern mixing.

Today is EBEW's pattern mixing day, which is a concept near and dear to me--I tend to be obnoxiously fearless when it comes to pattern mixing, which can be both good and bad. But over time, I've come up with a patented* list of tips and tricks that have helped me make the most of pattern mixing, and maybe they can help you too!


Start small. There's nothing wrong with tiny pattern mixing. Wear two patterned scarves, or maybe mix a patterned belt with a patterned top. If you combine an accessory with a piece of clothing, you can remove the accessory if you change your mind partway through the day.

Nervous? Play with texture and pattern instead. Pattern doesn't always mean print. Lace tights, appliques, and geometric necklaces and belts all have pattern in them. Try a crocheted cardigan with a striped skirt.

Stay in one colour palette to start. There's a piece of advice about pattern mixing I've followed from day one, and it's compliments of Clinton and Stacy: patterns can differ when they're in the same colour family. Black and white top? Black pinstripe pants? Do it! As you begin to feel more comfortable, try neutral patterns together, then branch out to more colour.

Different patterns are okay, but so are ones in the same. For a long time I thought different sizes of polka dot were a Real Bad Idea, but since then I've changed my mind. But polka dots can also be awesome with stripes, floral and paisley. Don't lock yourself in just because they're the same kind of pattern.

Items with a touch of pattern are gems. This cardigan is so versatile because it isn't all over pattern, and it works with more items because instead of being overwhelming, it's a subtle compliment to other patterns. I also have a cardigan with flowers in the armpits which is awesome for the same reason.

When all else fails, just do it. Some of my favourite pattern mixing outfits have been remarked upon as fashion flubs. But I liked them, so I consider them successes. I always go with Wikipedia's advice to editors, which is "be bold", when considering pattern mixing. Because really, what do I have to lose? Followers? Haha right you're all already finely attuned to my penchant for pattern mixing.

So go forth and mix! And as always, if you have questions, email me or comment. I'm here to help!


*not patented

Sunday, March 20, 2011

Sporthorse!


On me:
Helmet: Troxel
Tank: Target
Shirt: Target
Jeans: parts unknown
Half chaps: Dublin
Paddock boots: Ariat

On Indy:
Saddle: Bates
Bridle: older than the hills
Medicine boots: Professional's Choice


So you've met my valentine, and the next logical step is to meet my project! This is Indy, and he's probably the sweetest horse ever. He's not the smartest horse ever but he's probably the most willing to do anything. He is eight years old and he is half Thoroughbred and half Percheron. He has the mellow attitude and clunky moves of a Percheron but when he wants to he has the skill of a Thoroughbred. He's a really sweet guy and I quite enjoy riding him, even considering how lazy he is!


Style on a horse is usually the last thing I think of, but it can't hurt to wear proper clothing. Some of the riding style "rules" I've picked up over the years include:

Cover your shoulders. This sounds like a stupid rule, but I had a riding instructor who refused to let her students ride in sleeveless shirts because she saw a young woman tear open her shoulder once during a fall on gravelly footing. I've fallen on my shoulder and just on sand my arm's skin got scraped pretty badly, so I make it a habit to wear short sleeves, even in summer.

Don't underestimate stretch denim. I'm not talking jeggings because I doubt the fabric holds up well to riding, but a good pair of stretch denim jeans in a midrise are a godsend when I don't feel like prying on a peeling off my riding pants.

Don't wear loose clothing. This sounds counterproductive because during the winter I wear a ton of clothing to ride. But heavy doesn't equal loose, and here's why. Before I took up riding seriously (I was about 9 at the time), I was on a trail ride with my parents and the horse I was on ran off with me. I went flying, but my shirt got caught on the horn of the saddle. I was lucky and my shirt tore, though I'm sure I didn't see it that way at the time. If my shirt HADN'T torn, or if something else had gotten caught, I could have been dragged quite a way. Which is always worse than just falling. I also had an instructor who hated loose shirts in lessons because she couldn't see if my back was straight. Ha!

Do NOT wear anything that isn't wash and wear. This shouldn't be rocket science.

Belts are unnecessary. I hate belts when I'm riding and in Pony Club, I was required to wear a belt whenever my riding pants had beltloops. As far as I've always known, this is totally an aesthetic thing. Lame. Same for gloves, earrings and pearls.

Avoid fleece at shedding season. And dark clothing, for that matter. Fleece is a MAGNET for loose hair and the last thing you want when you're brushing your shedding gray horse is to be coated in the fuzz yourself. Black shirt? Same deal.

Put on your sunblock. Again, this doesn't take a genius. Another reason to wear sleeves is because they cover your shoulders.

Glasses are a touchy subject. Especially now, when it's cool to wear sunglasses all the time. George Morris (HUGE name in English riding) hates riders who wear glasses unless they're for health purposes, but how is a judge to know if a rider is wearing prescription glasses? Oh well. I need them to see, so I'll wear them whether George likes them or not!

That was probably uninteresting to most of you, but maybe you enjoyed it! Either way I hope you at least liked the pictures of Indy. I mean look at that face! How could you not? :)

Monday, January 10, 2011

Let me tell you about my coat


(Click for a larger version)

Cream coat: Target
Purple coat: JCPenney
Red coat: Gap
Shirt: Old Navy
Jeans: Walmart
Boots: Tractor Supply

It's Monday, and normally I'd be rolling around on the floor at work. But instead, a giant system dumped six inches of snow overnight and the entire county has essentially shut down. The perfect time for sleeping in and an outerwear blog post!

Today's guest star is Spud, my neighbour's dog. His owners have an electrical fence for him but he breaks through it regularly and comes to visit us. He's really sweet and a lot of fun, though, so we don't mind. He spent most of this photo shoot rolling and shoving his face in the snow. Since I can't really use my car as a tripod today, my mom was kind enough to take the pictures for this post. Thanks mom!


I've had this cream coat for a long time. It's boiled wool and unlined, so it's not very thick, but it's fairly warm. I wore it a lot in college, when I wasn't outside very long and I was young and foolish. It's a good fall coat though.


This red coat is fantastic. It's warm, it's lined, and even has a small chest pocket in the lining which is perfect for my iPod! I wore this coat a lot in college as well, especially in case of snow or really low temps. By really low I mean 20s, since I went to college in Virginia and the lowest I remember it ever getting there was 9. And I went horseback riding that day.


This purple coat is my most recent acquisition, but I love it. It's very, very warm and is longer than my other coats, which is great when I'm wearing a skirt. I bought it a couple weeks ago and it's already my daily work coat, in which I drive and battle my way across the freezing cold parking lot.

Things I look for when I pick out a coat:

Fit. This is absolutely the most important thing. I check the arms first, because my arms are the largest part of my body. If it fits with the arms down, then I do all sorts of things--I put my arms out like I'm driving, up in the air, I reach back. I do all this with the coat buttoned and unbuttoned. I consider how well the coat will fit with a thick sweater, cardigan, long sleeve shirt or short sleeve shirt on underneath. Put the collar up, then put it down. If there's a scarf nearby, put it on under the coat and over it to see how it feels. Check how you look in the mirror too--the coat may feel good on but you may see that the hem is two inches shorter on the left than the right. I once found a gorgeous red coat with a gradient to black at the bottom but the sleeves weren't long enough and the collar was too loose pulled up around my neck. Back to the rack.
Design. Do I need a knee length coat? Is the fabric thick enough to last four or five seasons of wear? Is it lined? Some coats I'll veto because the sleeves are meant to be bracelet length (rarely too long!) or the collar is cut oddly. Check for imperfections, loose threads and buttons, or torn lining. Also check the cleaning requirements--most nice winter coats are dry clean only, so consider that if you tend to be messy like me. (I honestly don't know how that cream coat has stayed clean for so long!)
Colour & style. Least important, certainly, but still important. Would you rather wear a red hip length coat or a black knee length one? Would you wear a coat in ANY colour or only black? How do you feel about patterns and gradients? Do you want your outfit to match your coat? I wore only black coats for a very long time, but I found that a coloured coat is usually more my style, especially since they're less likely to show cat hair!
FUN FACTOR!


There are a lot of things to consider when looking for a winter coat, mainly because they have to last longer than the average piece of clothing and they're abused regularly by the elements. Is there anything specific you look for in a winter coat?